Have your threads unravelled after you have cut and tied them to finish a project? To prevent unravelling, try the following. Cut and tie the threads in a square knot. Before trimming the tail ends of the knot, put a drop of fray block on top of the knot. Let it completely dry. Then trim the tail ends. This can help secure your ends.
Author: Laura
Why use a shuttle winder?
The Lacis shuttle winder works with a 4.25″ Tatsy shuttle. You use it to wind thread on to your shuttle. And it helps to preserve the integrity of your thread. Let me explain.
Did you ever notice how a shoelace frays when it has been pulled through eyelets too many times? On a smaller scale, the same thing can happen with tatting thread. When you wind thread on to your shuttle, you force the thread between two blades. When the blades pinch the thread, there is a clicking sound. This disturbs or weakens the natural twist of the thread. In the following example, let’s call the weakened or pinched point, Section A. If your thread has aged, then the point at which it is more likely to break is Section A. Or if you use Section A for a join and because the thread twist has been disturbed, the crochet hook can easily split the thread, making your tatting less tidy.
The pinch is more apparent on larger sizes of thread such as size 10, 5, or larger. A thread winder helps you avoid these things. The winder is seated between the blades and functions like the contour of a bow pulling the blades apart. It leaves a thin space for the thread to pass through without touching the blades. No damage is done to your thread.
Kinetic Sand
Karen Cabrera posted on her blog about a wonderful new toy called kinetic sand. Karen gave me permission to share it with you. She created this little angel using kinetic sand.

Kinetic sand is like wet sand that sticks to itself.
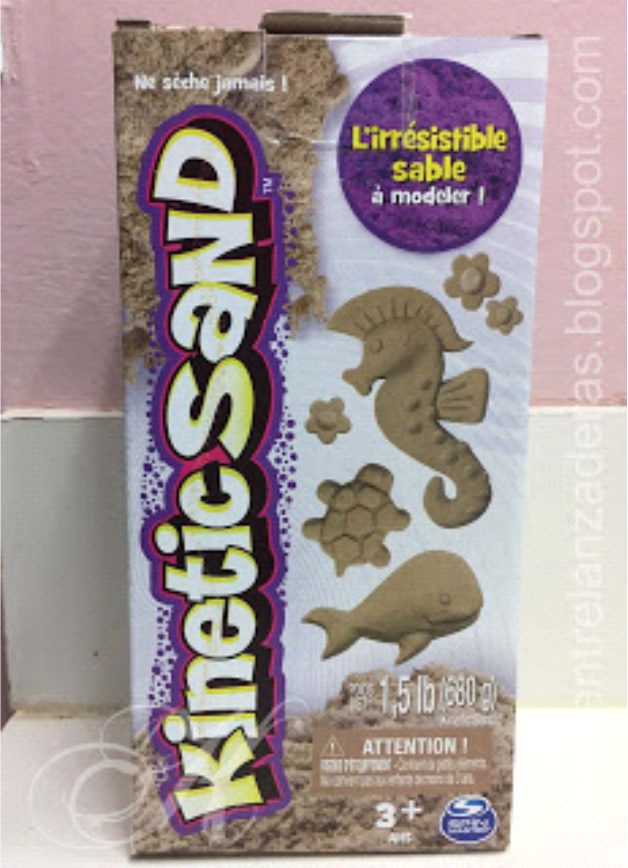
You can mold it into any shape.

The sand does easily fall apart. See video.
To prevent the sand from losing its shape, just cover it with a plastic bag and mold it. When you achieve the correct shape, close the plastic bag and tape it to hold its shape. Make sure the bag is as smooth as possible.
Before placing your tatting on the mold, add plastic wrap to make the area even smoother. The smoother the plastic, the easier it is to remove the tatting without any trouble.
In the photo below, Karen used a cardboard tube wrapped in plastic wrap for the wings. (Never use Styrofoam when using Amazing Fa-Brick as a hardener.)
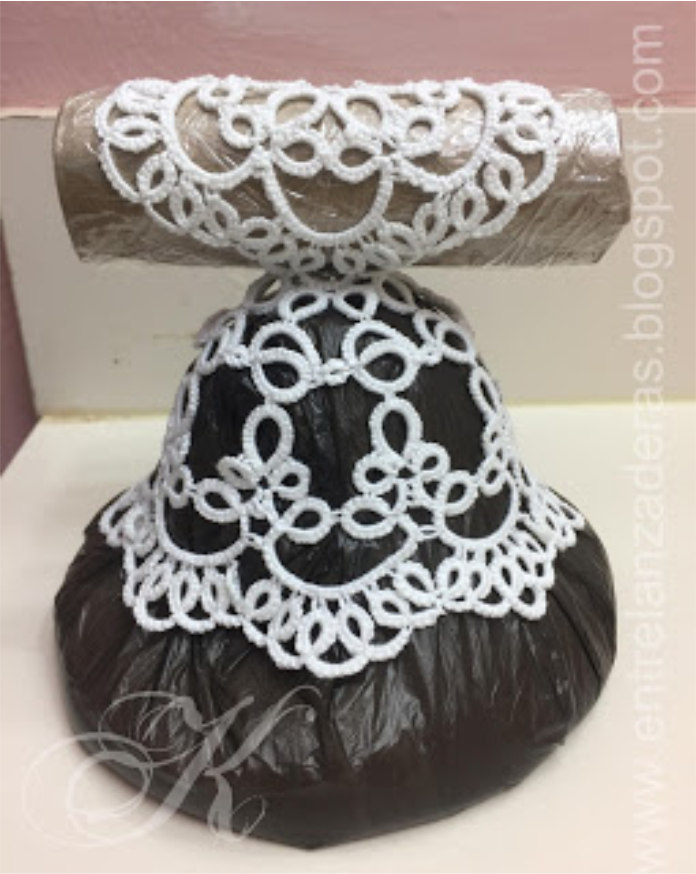
Note: The wings and the body were already joined with regular tatted joins before they were set on the molds.
Karen applied one coat of Amazing Fa-Brick. It dries clear and doesn’t stick to plastic. Its odor is no stronger than Elmer’s glue. It can be found here.

Before application, Karen likes to dampen the tatting to help it absorb this hardener. When it dries, it is as hard as vinyl tiles. If your tatting will be used outside, apply several coats, letting each dry in between applications. This creates a harder finished piece.
After 24 hours, the Amazing Fa-Brick dries. If you have applied the hardener correctly (read instructions on package), the tatting will not stretch when you remove it. You can pull away the plastic or gently slide a crochet hook between the tatting and plastic to lift off the tatting. The hardener may leave some residue which can be brushed away or removed with tweezers.
I am excited to try this. I hope you’ll give it a try. Have fun!
Story of Lady Vee Gray

One late afternoon I took a walk to our high school. Just before entering the school area, there is a sloped road. At the top of the slope was a black silhouette against the setting sun. The ears were exaggerated on a small head. It looked like a young rabbit. Silently, I walked towards it to get a closer look.
It heard me approach, stood up, and four thin legs unfolded beneath her. It was a little kitten! She started weaving in and out of my legs. I had to pick her up. She was so light and small I thought she must be about three months old.
When I got home, I fed her. Then she fell asleep on my lap. I named her Lady Vee Gray (as it turns out she is a polite lady). The next day I took her to the vet. She weighed 2.75 pounds. The vet identified six-month old teeth. (Later, we realized she was actually seven months old at the time.) The vet said if I hadn’t found her, Vee would not have lived through the weekend.
Despite her tenuous start, at eight years old, she still enjoys being outside. She has left bugs and leaves on my doorstep. (No wonder she was starving.) But she spends every night inside the house.
Free Needle Tatting Pattern
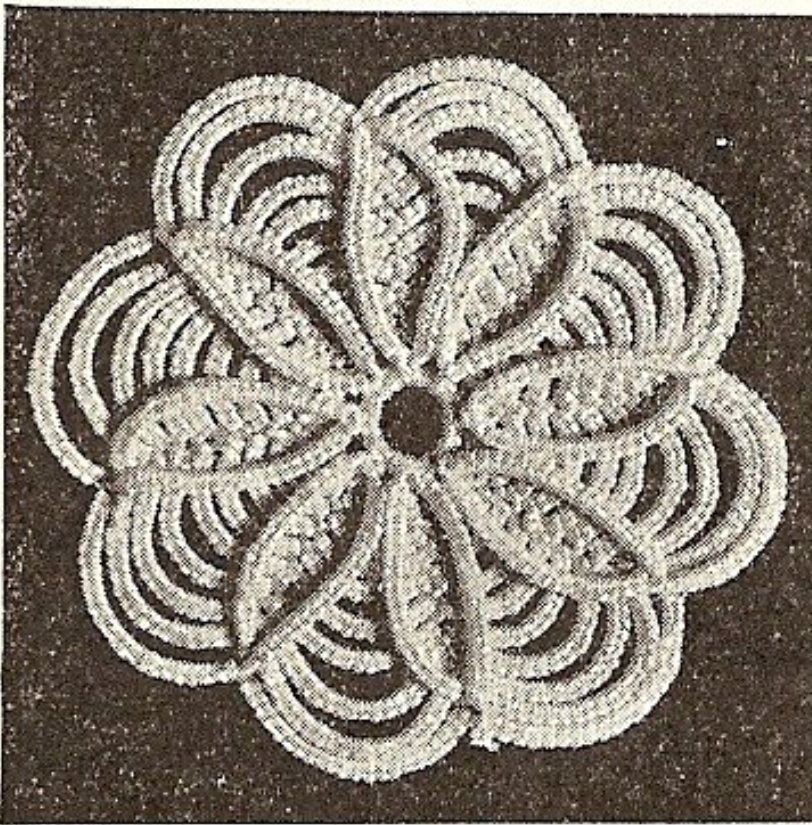
Tatted Daisy by Mrs. W. M. Odum.

Shared from a post on Pinterest
This pattern has extended instructions for the beginning needle tatter. If you need to find out what a term means: click on “Terms”, choose “Terms for Needle Tatting.”
Supplies
Crochet Thread (Size 10)
Tatting Needle (Size 7)
Crochet Hook (Size 8)
Picot Gauge (1/8″)
Small Scissors
Needle Threader
Abbreviation Key
ds = double stitch(es)
p = picot
Reverse Work: turn motif to its opposite side in a motion similar to opening or closing an oven
door.
Rotate Work: turn work like a bicycle wheel rotates, except you may go in clockwise
or counterclockwise direction. Do not turn motif to its opposite side.
Turn Work: to opposite side as if turning over a page.
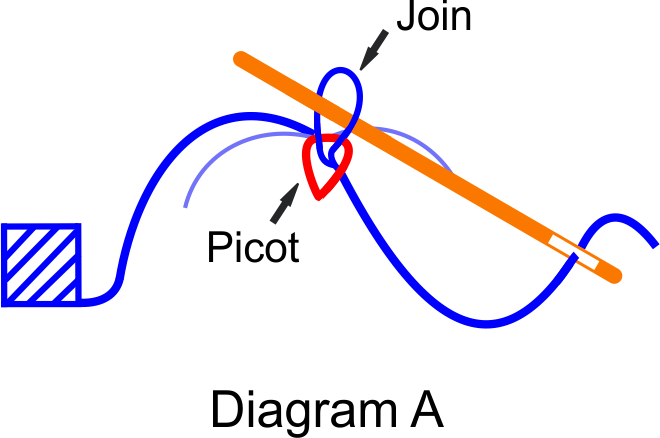
Join
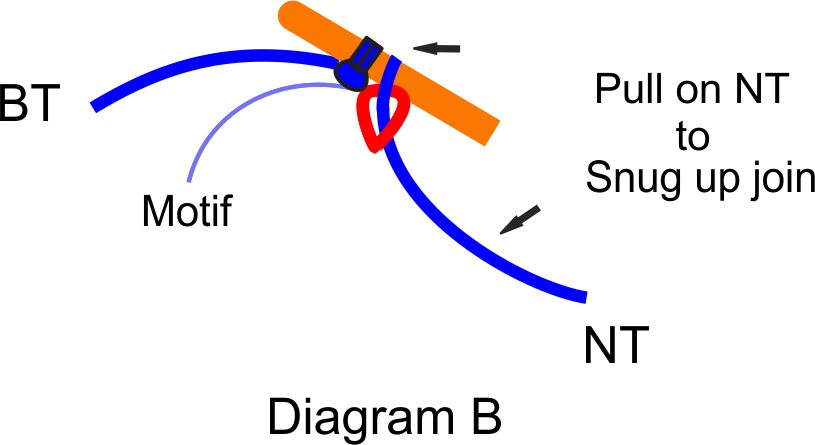
In this pattern “join” means: After the last double stitch of chain is made, do not close. The front side faces you. Insert crochet hook (front side to backside) through picot. Pull up needle thread (NT) from the backside to form a loop. Then insert needle (backside to front) through loop (Diagram A). This is the join. Pull on needle thread to snug up join. Then use the ball thread (BT) to make the required number of double stitches for the next chain (Diagram B).
Preparation

For Round 1: thread 5″ for tail end. Leave 7″ of Loop thread before making the first double stitch.
Round 1

Ring: 2 ds, p, 2 ds, p, 2 ds, p, 2 ds, p, 2 ds, p, 2 ds, p, 2 ds, p, 2 ds. (All 7 picots = 1/8″.)
Leave 4″ before cutting needle and ball threads. Tie in a square knot. (Optional: sew in ends.)
Round 2
Rethread needle as follows:
Thread needle with 44″ for the tail end.
Leave 46″ of Loop thread before making the first double stitch.
First make the join: pull up (back to front side) needle thread through picot to make a loop. Insert needle (back to front side).

Then make the chain according to the following instructions:
*Chain: 4 ds. Do not close. Join to next picot per instructions.*
Repeat from * to * around.
Round 3
*Chain: 6 ds. Do not close. Join to next picot per instructions.*
Repeat from * to * around.
Round 4
*Chain: 8 ds. Do not close. Join to next picot per instructions.*
Repeat from * to * around.
Round 5
In this round you will add a marker after completing the first chain. The marker is a 4″ piece of scrap thread. Tie or drape it over the newly completely chain. Then continue making chains of 10 double stitches all the way around.
*Chain: 10 ds. Do not close. Join to next picot per instructions.*
Repeat from * to * around.
After making the last chain in the current round, remove scrap thread. Make the first chain of the subsequent round. Tie on the marker.
Rounds 6-11
Continue making the chains and joining as usual. Just add 2 stitches to each chain for each additional round. (Hint: Round 6 has 12 double stitches. Round 11 has 22 double stitches.)
Round 12
(Last Round)
*Chain: Make 20 ds (Diagram C). Insert needle (back to front) through center picot (Diagram D). Do not close. Rotate work.

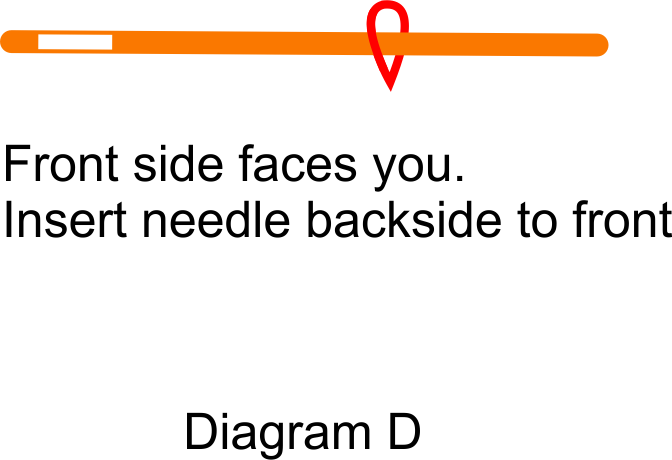
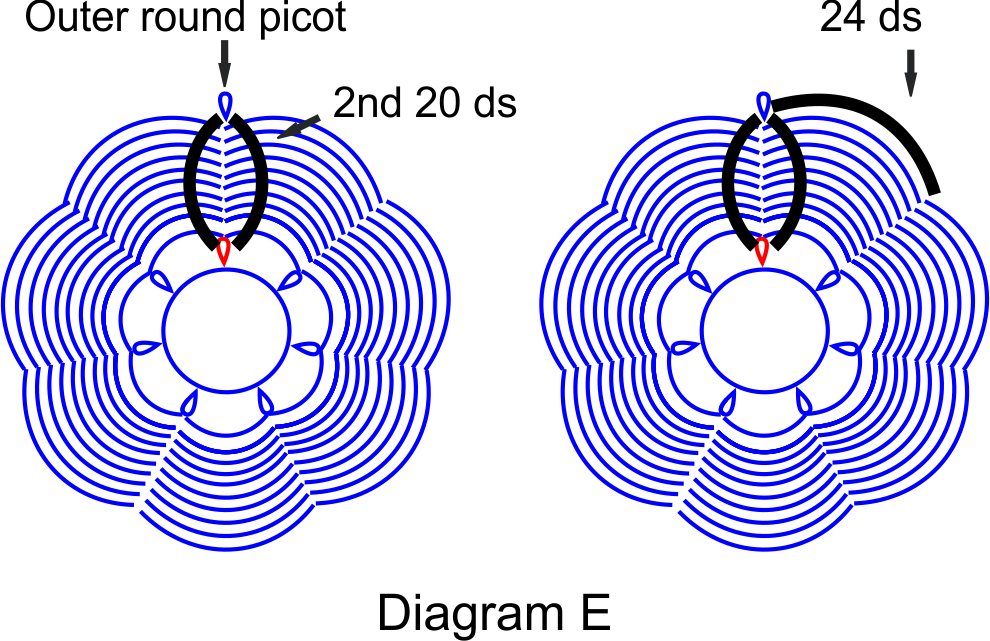
Chain: Make 20 ds. Insert needle (front to back this time) completely through picot on the outer round (Diagram E).
Chain: Make 24 double stitches on the outer round.* Repeat from * to * around.
Join last chain to first picot of the round. Cut and tie in a square knot.
Free Pattern
Tatted Daisy by Mrs. W. M. Odum. It is found here.
For your convenience, I rewrote the pattern so it is easier to read.
Supplies:
2 small Sew Mate shuttles (both full / add thread as needed)
Lizbeth Thread (Size 20)
Crochet Hook (Size 11)
Picot Gauge (1/8″) (.32 cm)
Abbreviations:
Ch = Chain
DS = Double Stitch(es)
J / + = Join
MP = Mock Picot
Rep = Repeat
RW = Reverse Work
R = Ring
Sh1 = Shuttle 1
Sh2 = Shuttle 2
Notes:
All picots = 1/8″ (.32 cm)
Join A: (Pull (backside to front) Sh1 thread to make a loop, insert (front to backside) Sh1 through loop.)
Join B: (Pull (backside to front) Sh2 thread to make a loop, insert (front to backside) Sh1 through loop.)
Round 1:
R: 2 – 2 – 2 – 2 – 2 – 2 – 2 / – (MP.) RW. (7 picots total.)
Round 2:
Ch: [4, + (j. to next picot of center ring), 4] (Rep. 7 times.) Join to first picot where you started.
Round 3:
Ch: Picot, 6, + (j. to next picot),
*6, + (j. to next picot)*
Rep. from * to * around.
Rounds 4 – 10: Same as Row 3.
Add 2 DS to each chain in the succeeding rows.
(Hint: Round 4 = 8 DS in each Ch and Round 10 = 22 DS in each Ch.)
Round 11: (Last Round)
Chain 20 DS, bring it across the top of the medallion to center.
Use Join A to make a join to first picot of center ring. Rotate work.
Chain 20 DS, carry chain to outer round.
Use Join A to make a join to starting point. Rotate work.
*Chain 24, use Join B to make a join to the next picot on the outside round.
Chain 20, use Join A to join to next picot of center ring.
Chain 20, use Join A to make a join to the starting point.*
Repeat from * (Chain 24) to * around.
After you have made last chain of 24 DS, leave 3-4″ (7.6 – 10 cm) of Sh1 and Sh2 threads. Cut threads.
Use a crochet hook to pull Sh1 thread (front to backside) down through first picot of the first chain on outside round.
Tie Sh1 and Sh2 threads in a square knot. Or finished using your preferred method.
Note: In Round 11, I used 23 double stitches instead of 24. I thought this made the space between the last round and previous rounds look equal in size. In other words, adding 24 DS made the space between the previous chain and the last outer chain appear larger than normal.
If you need to know what a term means, click here. Then click on “Shuttle Tatting.” Scroll down to click on the term in question.